Print Screen button on laptop keyboard
As a matter of fact, it is so darn easy it is ridiculous many people don’t know how to do it.
In this age of Android smartphones where it seems everybody is migrating to mobile devices, the art of taking a screen shot with a PC is disappearing. The fact is,Android apps make it easy to do everything people have become lazy learning new tricks PCs.
However, there are computer softwares able to take screen shots of your PC without any stress. But why use a software when Windows comes bundled with a software you can use to take your screenshots?
So if you have a Windows PC and have been wondering how to take shots of anything showing on your desktop, you are in the right place to learn how to do it.
Taking Screenshots with ‘prt sc’ button
This was the first method I learned about how to take screenshots. Like I said before, it is very easy.
At the far right corner of your Windows PC keyboard is the ‘prt sc’ button looking useless. It turns out that ‘prt sc’ is the abbreviation for ‘print screen.‘ Hitting the button would take a snapshot of what is showing on your desktop at the moment.
Again, hitting the button would take a snapshot of whatever is on your screen.
In some laptops, to get the ‘prt sc’ button, you need to combine it with the ‘fn’ button. That is, you hit ‘fn+prt sc’ to take a shot of your screen. In some PCs though, there is a dedicated ‘prt sc’ button at the top right hand corner of the keyboard.
The next step is to locate where the image is.
Opening Paint in Widows 7 and earlier versions of Window
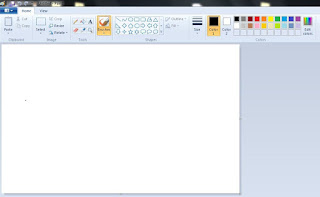
The software to use is ‘Paint‘ which is present in the ‘Accessories’ folder in the ‘Programs’ menu.
Just click the Start > All Programs > Accessories > Paintand open it.
For Windows 8, just swipe your finger across the touch pad from the right edge to expose the side bar. Then click ‘Search’ and type ‘paint’ in the search box.
Then click on ‘Paint’ to open the software.
Paint
In the ‘Paint‘ interface, look to the left side of the menu bar. Click on ‘Paste.’ The screenshot you took would be pasted in the blank work area.
If you know how to use Paint, you can now edit the picture to your taste like adding texts, cropping somethings out, adding colors and so much more. You can leave it like that if you want to.
Click on ‘File’ in the menu box then click on ‘Save’ or ‘Save as’to save the image to your hard drive. The folder or destination where the file is saved depends on the default settings of the PC if you have not used paint before.
Saving image
Before naming the file and finally hitting ‘OK’, you can chose to change the location of the file for your convenience. The default location is the ‘Documents’folder for most PCs.
Of course you would be given options on what kind of file format you want to save the image.
For each format, there is a short write up explaining the meaning and use of each format to help you out. Your choice would of course depend on what you want to do with the file.
Just hit ‘OK’ after you made your choice; that is all.
Try it out and see how easy it is. You might scramble around the first time trying to get used to things. But I assure you, it won’t take more than 30 minutes to completely master it.
If you are a pro with Paint, or other photo editing softwares, the world is at your finger tips in terms how you can edit your images.


u are d boss bro
ReplyDelete